| .github/workflows | ||
| example | ||
| .golangci-soft.yml | ||
| .golangci.yml | ||
| align.go | ||
| ansi_unix.go | ||
| ansi_windows.go | ||
| borders.go | ||
| color_test.go | ||
| color.go | ||
| get.go | ||
| go.mod | ||
| go.sum | ||
| join.go | ||
| LICENSE | ||
| position.go | ||
| README.md | ||
| runes_test.go | ||
| runes.go | ||
| set.go | ||
| size.go | ||
| style.go | ||
| unset.go | ||
| whitespace.go | ||
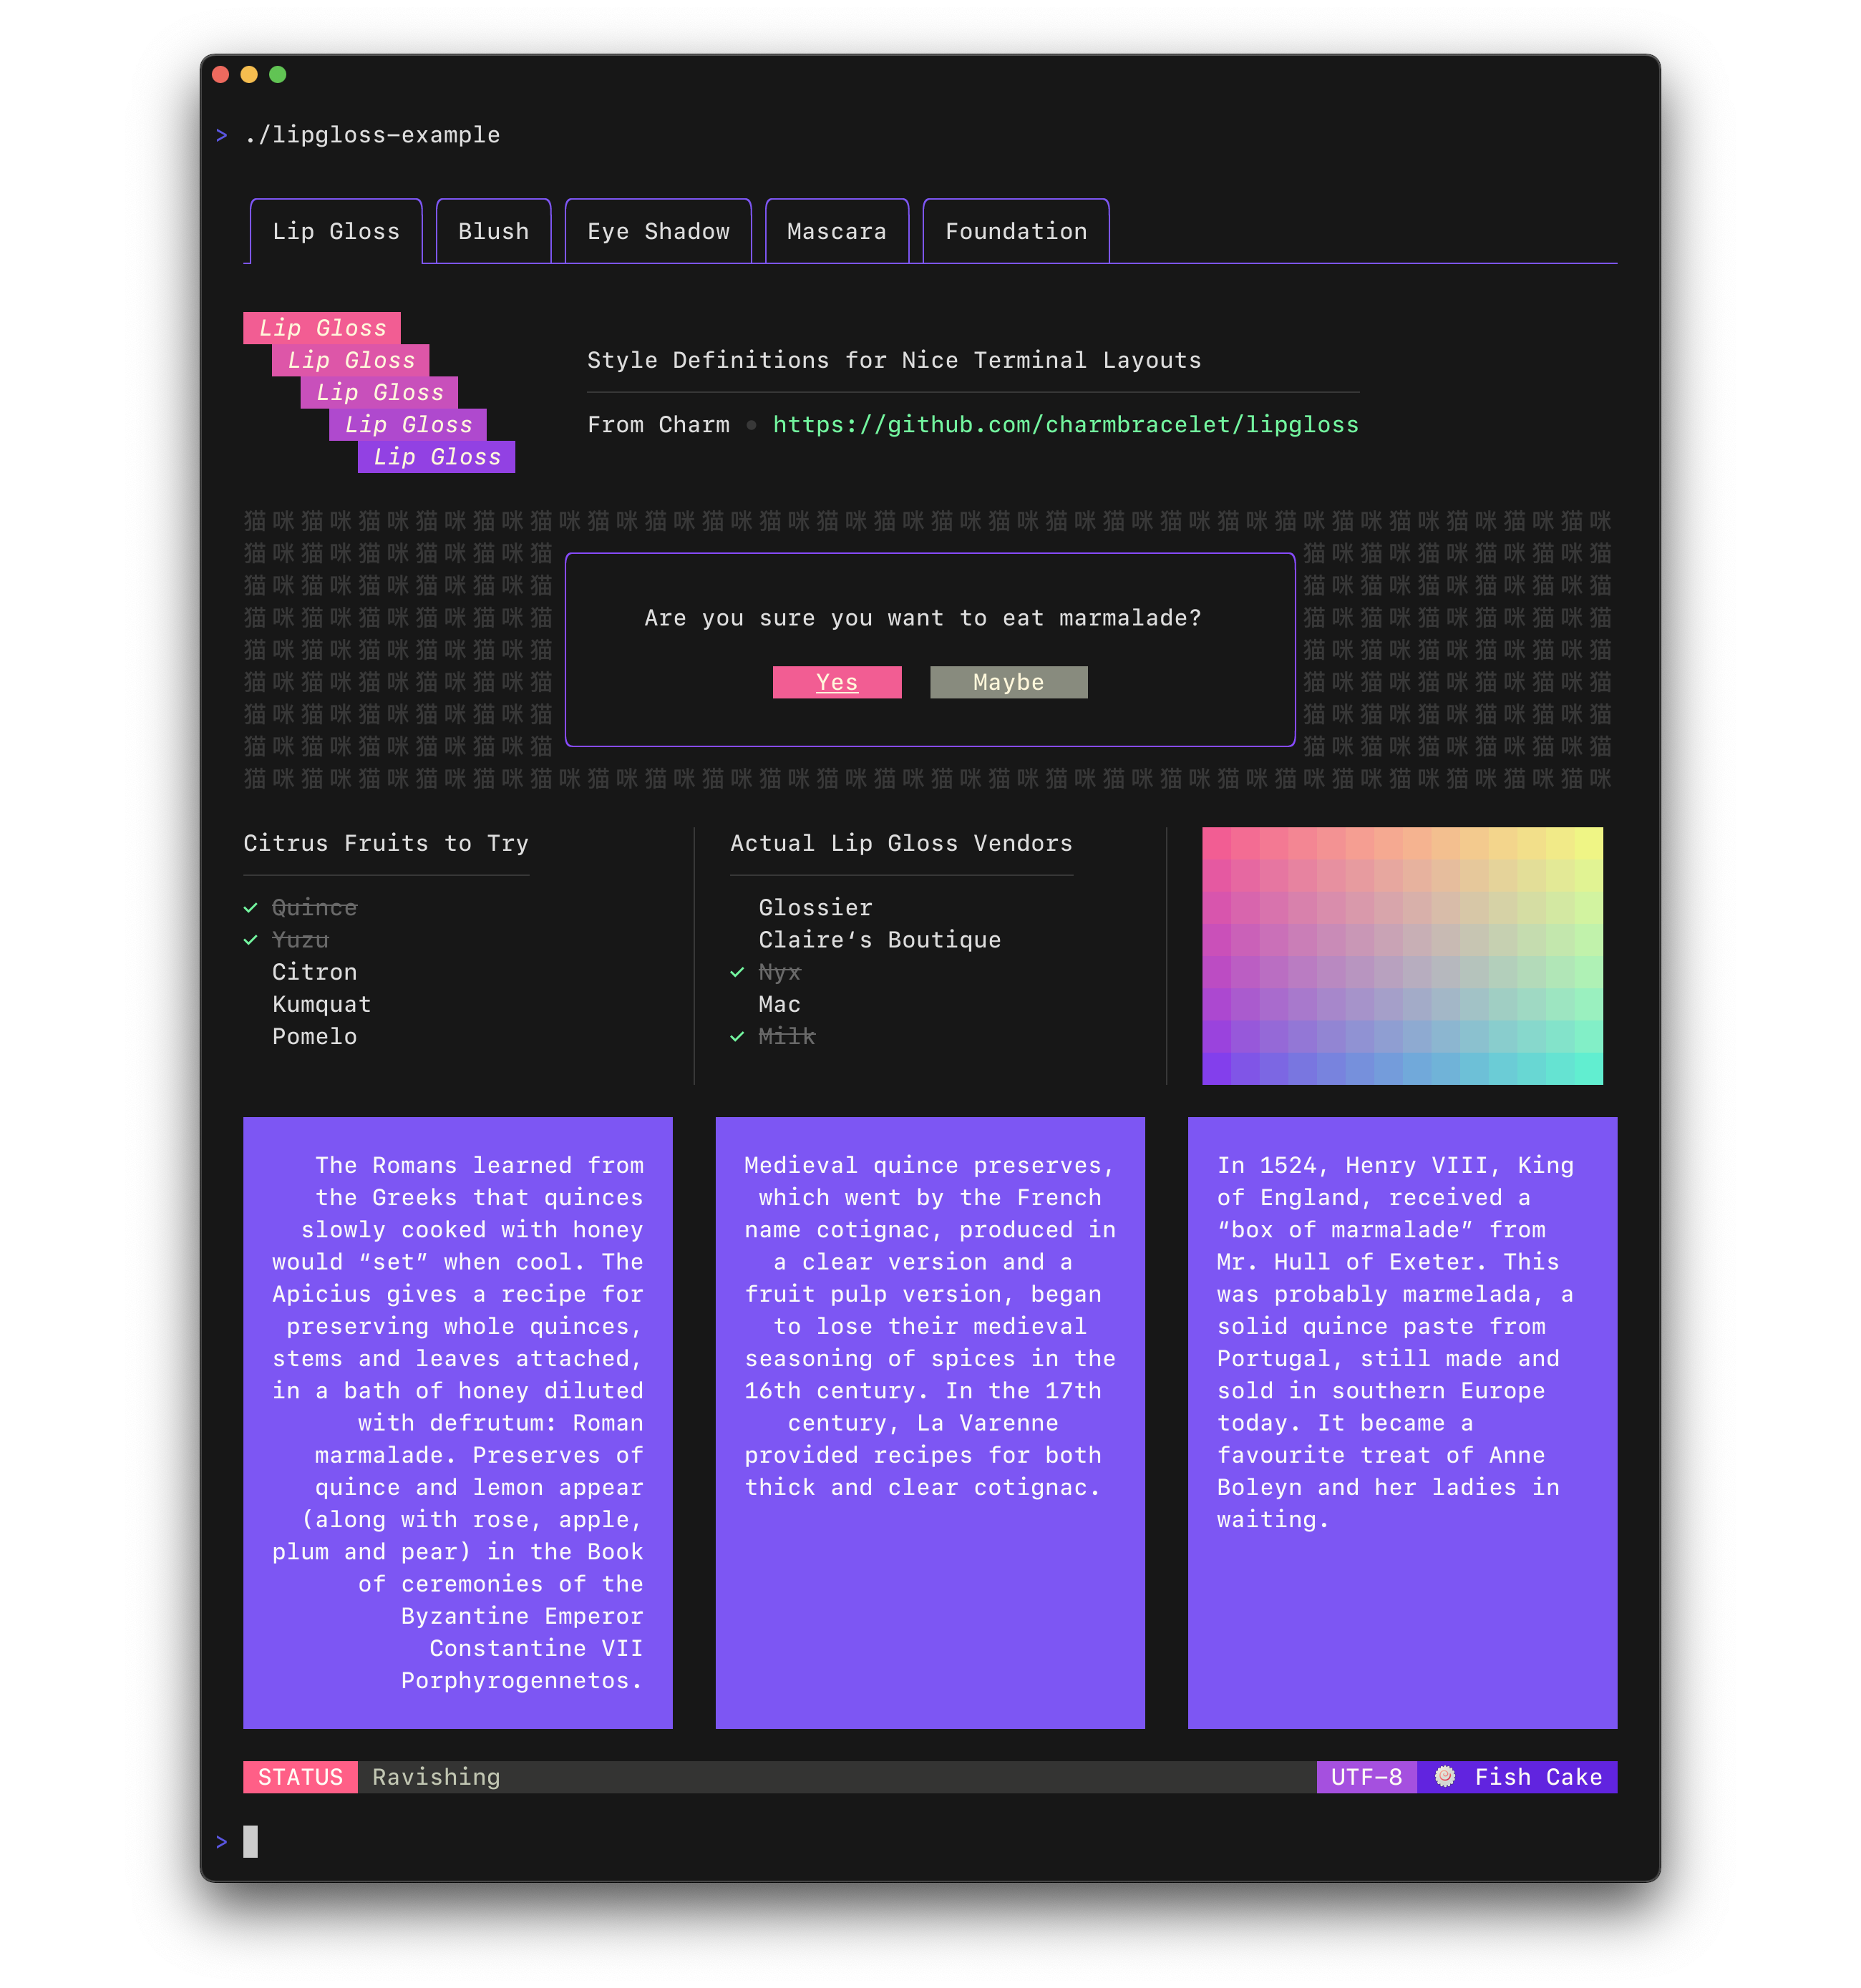
Lip Gloss
Style definitions for nice terminal layouts. Built with TUIs in mind.
Lip Gloss takes an expressive, declarative approach to terminal rendering. Users familiar with CSS will feel at home with Lip Gloss.
import "github.com/charmbracelet/lipgloss"

var style = lipgloss.NewStyle().
    Bold(true).
    Foreground(lipgloss.Color("#FAFAFA")).
    Background(lipgloss.Color("#7D56F4")).
    PaddingTop(2).
    PaddingLeft(4).
    Width(22)

fmt.Println(style.Render("Hello, kitty."))
Colors
Lip Gloss supports the following color profiles:
ANSI 16 colors (4-bit)
lipgloss.Color("5")  // magenta
lipgloss.Color("9")  // red
lipgloss.Color("12") // light blue
ANSI 256 Colors (8-bit)
lipgloss.Color("86")  // aqua
lipgloss.Color("201") // hot pink
lipgloss.Color("202") // orange
True Color (16,777,216 colors; 24-bit)
lipgloss.Color("#0000FF") // good ol' 100% blue
lipgloss.Color("#04B575") // a green
lipgloss.Color("#3C3C3C") // a dark gray
...as well as a 1-bit Ascii profile, which is black and white only.
The terminal's color profile will be automatically detected, and colors outside the gamut of the current palette will be automatically coerced to their closest available value.
Adaptive Colors
You can also specify color options for light and dark backgrounds:
lipgloss.AdaptiveColor{Light: "236", Dark: "248"}
The terminal's background color will automatically be detected and the appropriate color will be chosen at runtime.
Inline Formatting
Lip Gloss supports the usual ANSI text formatting options:
var style = lipgloss.NewStyle().
    Bold(true).
    Italic(true).
    Faint(true).
    Blink(true).
    Strikethrough(true).
    Underline(true).
    Reverse(true)
Block-Level Formatting
Lip Gloss also supports rules for block-level formatting:
// Padding
var style = lipgloss.NewStyle().
    PaddingTop(2).
    PaddingRight(4).
    PaddingBottom(2).
    PaddingLeft(4)

// Margins
var style = lipgloss.NewStyle().
    MarginTop(2).
    MarginRight(4).
    MarginBottom(2).
    MarginLeft(4)
There is also shorthand syntax for margins and padding, which follows the same format as CSS:
// 2 cells on all sides
lipgloss.NewStyle().Padding(2)

// 2 cells on the top and bottom, 4 cells on the left and right
lipgloss.NewStyle().Margin(2, 4)

// 1 cell on the top, 4 cells on the sides, 2 cells on the bottom
lipgloss.NewStyle().Padding(1, 4, 2)

// Clockwise, starting from the top: 2 cells on the top, 4 on the right, 3 on
// the bottom, and 1 on the left
lipgloss.NewStyle().Margin(2, 4, 3, 1)
Aligning Text
You can align paragraphs of text to the left, right, or center.
var style = lipgloss.NewStyle().
    Width(24).
    Align(lipgloss.Left).  // align it left
    Align(lipgloss.Right). // no wait, align it right
    Align(lipgloss.Center) // just kidding, align it in the center
Width and Height
Setting a minimum width and height is simple and straightforward.
var str = lipgloss.NewStyle().
    Width(24).
    Height(32).
    Foreground(lipgloss.Color("63")).
    Render("What’s for lunch?")
Borders
Adding borders is easy:
// Add a purple, rectangular border
var style = lipgloss.NewStyle().
    BorderStyle(lipgloss.NormalBorder()).
    BorderForeground(lipgloss.Color("63"))

// Set a rounded, yellow-on-purple border to the top and left
var anotherStyle = lipgloss.NewStyle().
    BorderStyle(lipgloss.RoundedBorder()).
    BorderForeground(lipgloss.Color("228")).
    BorderBackground(lipgloss.Color("63")).
    BorderTop(true).
    BorderLeft(true)

// Make your own border
var myCuteBorder = lipgloss.Border{
    Top:         "._.:*:",
    Bottom:      "._.:*:",
    Left:        "|*",
    Right:       "|*",
    TopLeft:     "*",
    TopRight:    "*",
    BottomLeft:  "*",
    BottomRight: "*",
}
There are also shorthand functions for defining borders, which follow a similar pattern to the margin and padding shorthand functions.
// Add a thick border to the top and bottom
lipgloss.NewStyle().
    Border(lipgloss.ThickBorder(), true, false)

// Add a thick border to the right and bottom sides. Rules are set clockwise
// from top.
lipgloss.NewStyle().
    Border(lipgloss.DoubleBorder(), true, false, false, true)
For more on borders see the docs.
Copying Styles
Just use Copy():
var style = lipgloss.NewStyle().Foreground(lipgloss.Color("219"))

var wildStyle = style.Copy().Blink(true)
Copy() performs a copy on the underlying data structure ensuring that you get
a true, dereferenced copy of a style. Without copying it's possible to mutate
styles.
Inheritance
Styles can inherit rules from other styles. When inheriting, only unset rules on the receiver are inherited.
var styleA = lipgloss.NewStyle().
    Foreground(lipgloss.Color("229")).
    Background(lipgloss.Color("63"))

// Only the background color will be inherited here, because the foreground
// color will have been already set:
var styleB = lipgloss.NewStyle().
    Foreground(lipgloss.Color("201")).
    Inherit(styleA)
Unsetting Rules
All rules can be unset:
var style = lipgloss.NewStyle().
    Bold(true).                        // make it bold
    UnsetBold().                       // jk don't make it bold
    Background(lipgloss.Color("227")). // yellow background
    UnsetBackground()                  // never mind
When a rule is unset, it won't be inherited or copied.
Enforcing Rules
Sometimes, such as when developing a component, you want to make sure style
definitions respect their intended purpose in the UI. This is where Inline
and MaxWidth, and MaxHeight come in:
// Force rendering onto a single line, ignoring margins, padding, and borders.
someStyle.Inline(true).Render("yadda yadda")

// Also limit rendering to five cells
someStyle.Inline(true).MaxWidth(5).Render("yadda yadda")

// Limit rendering to a 5x5 cell block
someStyle.MaxWidth(5).MaxHeight(5).Render("yadda yadda")
Rendering
Generally, you just call the Render(string) method on a lipgloss.Style:
fmt.Println(lipgloss.NewStyle().Bold(true).Render("Hello, kitty."))
But you could also use the Stringer interface:
var style = lipgloss.NewStyle().SetString("你好,猫咪。").Bold(true)

fmt.Printf("%s\n", style)
Utilities
In addition to pure styling, Lip Gloss also ships with some utilities to help assemble your layouts.
Joining Paragraphs
Horizontally and vertically joining paragraphs is a cinch.
// Horizontally join three paragraphs along their bottom edges
lipgloss.JoinHorizontal(lipgloss.Bottom, paragraphA, paragraphB, paragraphC)

// Vertically join two paragraphs along their center axes
lipgloss.JoinVertical(lipgloss.Center, paragraphA, paragraphB)

// Horizontally join three paragraphs, with the shorter ones aligning 20%
// from the top of the tallest
lipgloss.JoinHorizontal(0.2, paragraphA, paragraphB, paragraphC)
Measuring Width and Height
Sometimes you’ll want to know the width and height of text blocks when building your layouts.
var block string = lipgloss.NewStyle().
    Width(40).
    Padding(2).
    Render(someLongString)

// Get the actual, physical dimensions of the text block.
width := lipgloss.Width(block)
height := lipgloss.Height(block)

// Here's a shorthand function.
w, h := lipgloss.Size(block)
Placing Text in Whitespace
Sometimes you’ll simply want to place a block of text in whitespace.
// Center a paragraph horizontally in a space 80 cells wide. The height of
// the block returned will be as tall as the input paragraph.
block := lipgloss.PlaceHorizontal(80, lipgloss.Center, fancyStyledParagraph)

// Place a paragraph at the bottom of a space 30 cells tall. The width of
// the text block returned will be as wide as the input paragraph.
block := lipgloss.PlaceVertical(30, lipgloss.Bottom, fancyStyledParagraph)

// Place a paragraph in the bottom right corner of a 30x80 cell space.
block := lipgloss.Place(30, 80, lipgloss.Right, lipgloss.Bottom, fancyStyledParagraph)
You can also style the whitespace. For details, see the docs.
What about Bubble Tea?
Lip Gloss doesn’t replace Bubble Tea. Rather, it is an excellent Bubble Tea companion. It was designed to make assembling terminal user interface views as simple and fun as possible so that you can focus on building your application instead of concerning yourself with low-level layout details.
In simple terms, you can use Lip Gloss to help build your Bubble Tea views.
Under the Hood
Lip Gloss is built on the excellent Termenv and Reflow libraries which deal with color and ANSI-aware text operations, respectively. For many use cases Termenv and Reflow will be sufficient for your needs.
Rendering Markdown
For a more document-centric rendering solution with support for things like lists, tables, and syntax-highlighted code have a look at Glamour, the stylesheet-based Markdown renderer.
License
Part of Charm.
Charm热爱开源 • Charm loves open source


