This commit improves the documentation by converting raw URLs into descriptive text links in the FAQ and BadUSB documentation. This enhances readability and navigation for users looking for specific information. Additionally, minor formatting adjustments were made for better consistency and clarity.
3.6 KiB
Firmware update on Developer Board
Important
It's important to regularly update your Developer Board to ensure that you have access to the latest features and bug fixes. This tutorial will guide you through the necessary steps to update the firmware of your Developer Board.
This tutorial assumes that you're familiar with the basics of the command line.
If you’re not, please refer to the Windows or MacOS / Linux command line tutorials.
Installing the micro Flipper Build Tool
Micro Flipper Build Tool (uFBT) is a cross-platform tool that enables basic development tasks for Flipper Zero, such as building and debugging applications, flashing firmware, and creating VS Code development configurations.
Install uFBT on your computer by running the following command in the Terminal:
For Linux & macOS:
python3 -m pip install --upgrade ufbt
For Windows:
python -m pip install --upgrade ufbt
If you want to learn more about uFBT, visit the project's page.
Connecting the Developer Board to your computer
-
List all of the serial devices on your computer.
Windows
On Windows, go to Device Manager and expand the Ports (COM & LPT) section.
macOS
On macOS, you can run the following command in the Terminal:
ls /dev/cu.*Linux
On Linux, you can run the following command in the Terminal:
ls /dev/tty*View the devices in the list.
-
Connect the Developer Board to your computer using a USB-C cable.

-
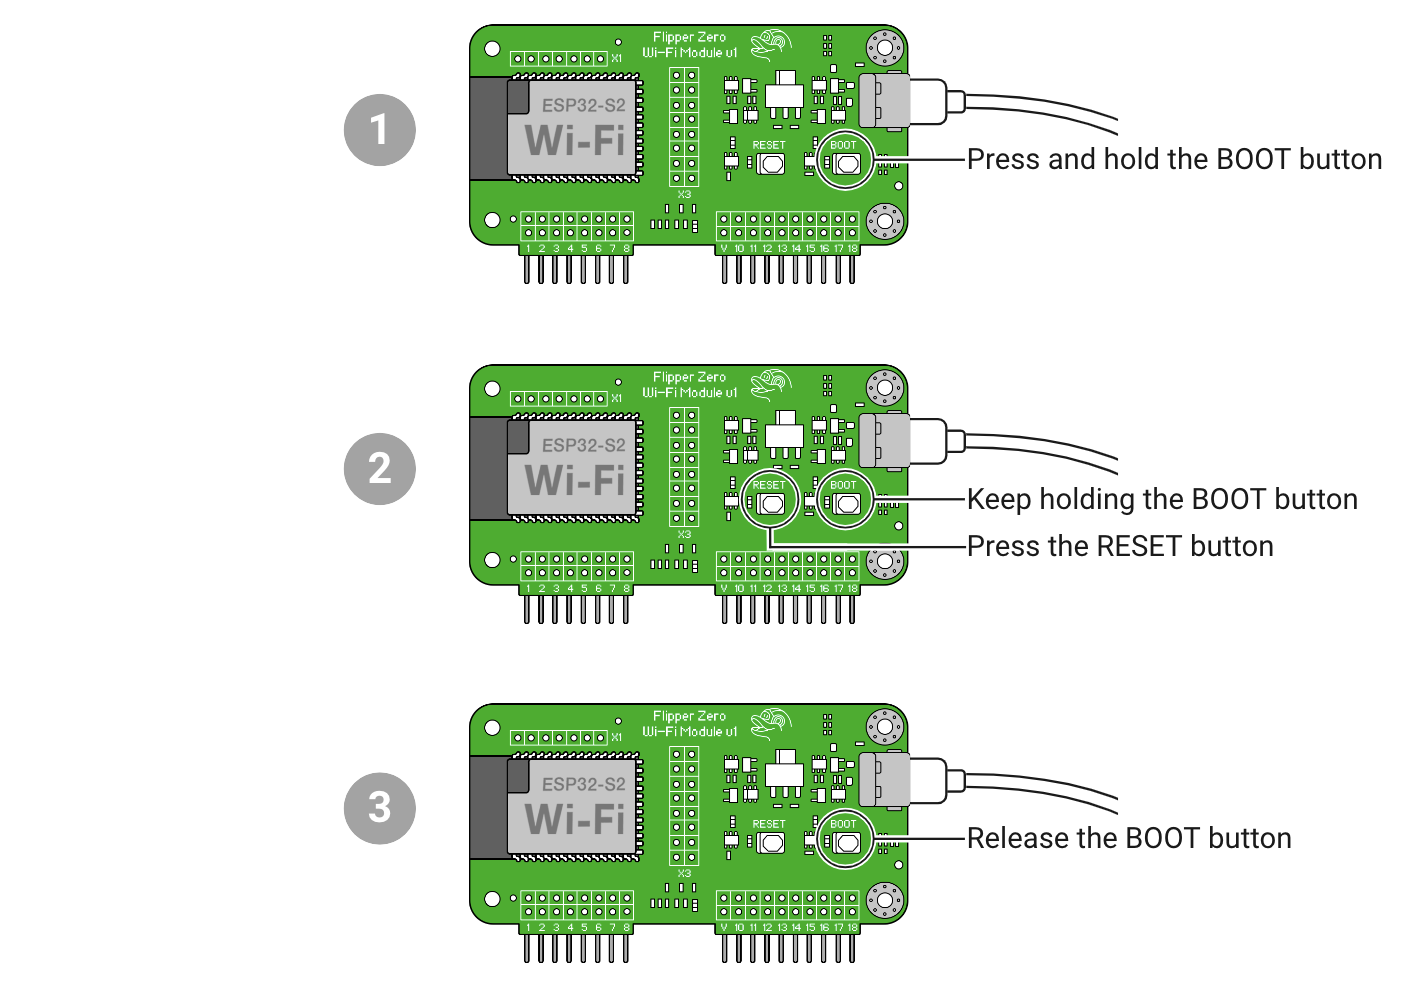
Switch your Developer Board to Bootloader mode: 3.1. Press and hold the BOOT button. 3.2. Press the RESET button while holding the BOOT button. 3.3. Release the BOOT button.

-
Repeat Step 1 and view the name of your Developer Board that appeared in the list.
For example, on macOS:
/dev/cu.usbmodem01
Flashing the firmware
To flash the firmware onto your Developer Board, run the following command in the terminal:
python3 -m ufbt devboard_flash
You should see the following message: WiFi board flashed successfully.
If flashing failed
If you get an error message during the flashing process, such as this:
A fatal error occurred: Serial data stream stopped: Possible serial noise or corruption.
Or this:
FileNotFoundError: [Errno 2] No such file or directory: '/dev/cu.usbmodem01'
Try doing the following:
- Disconnect the Developer Board from your computer, then reconnect it.
- Use a different USB port on your computer.
- Use a different USB-C cable.
Finishing the installation
After flashing the firmware:
The Developer Board should appear as a serial device on your computer. Now, you can use it with the Black Magic Debug client of your choice.
