GITHUB_PR_NUMBER: 9048
GITHUB_PR_URL: https://github.com/hasura/graphql-engine/pull/9048

PR-URL: https://github.com/hasura/graphql-engine-mono/pull/6159
Co-authored-by: Amit Kumar Sharma <91947037+amit-ksh@users.noreply.github.com>
Co-authored-by: github-actions[bot] <41898282+github-actions[bot]@users.noreply.github.com>
GitOrigin-RevId: 0565d8a00c944d72b46bc5ce0ff40fc3e8bfca51
4.2 KiB
nextjs-postgres-graphql
Boilerplate to get started with Nextjs, Hasura GraphQL engine as CMS and postgres as database using Apollo Client.
Tutorial
-
Deploy GraphQL Engine on Hasura Cloud and setup PostgreSQL via Heroku:
-
Get the GraphQL API URL for your Hasura app from settings (say
nextjs-graphql.hasura.app) -
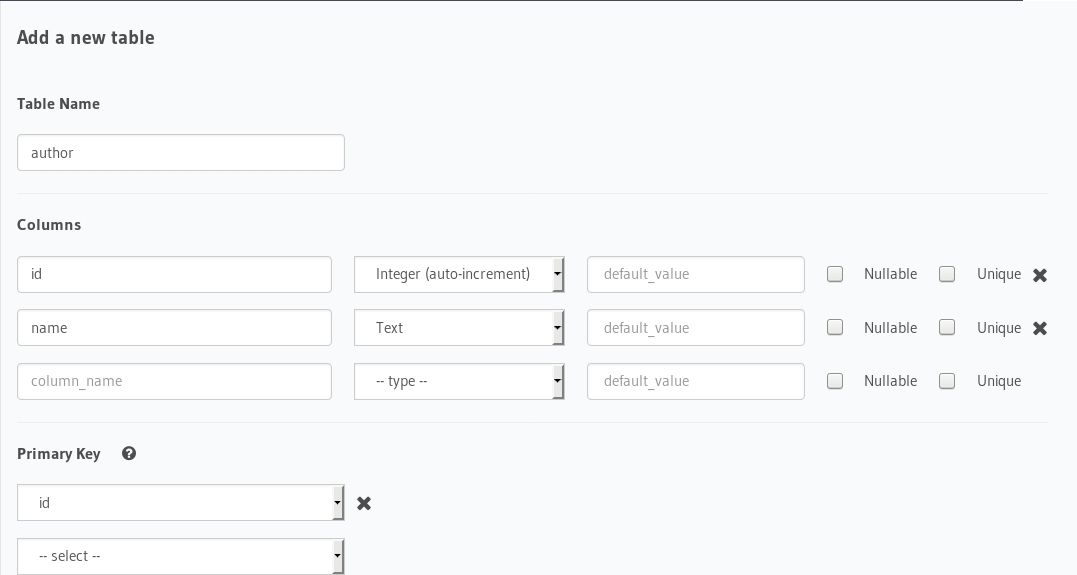
Create
authortable:Open Hasura console: visit https://nextjs-graphql.hasura.app on a browser
Navigate toDatasection in the top nav bar and create a table as follows: -
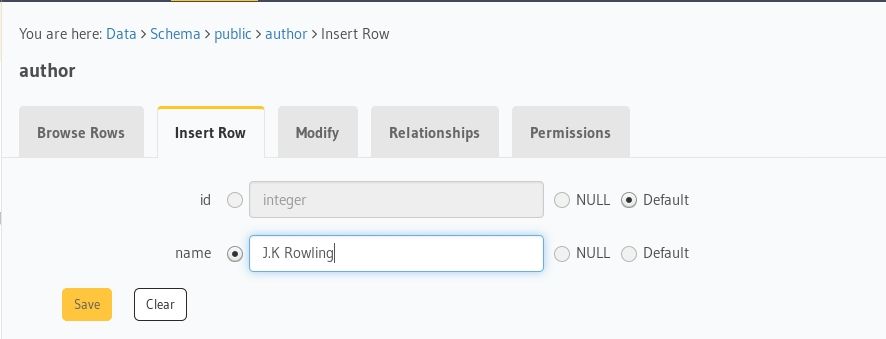
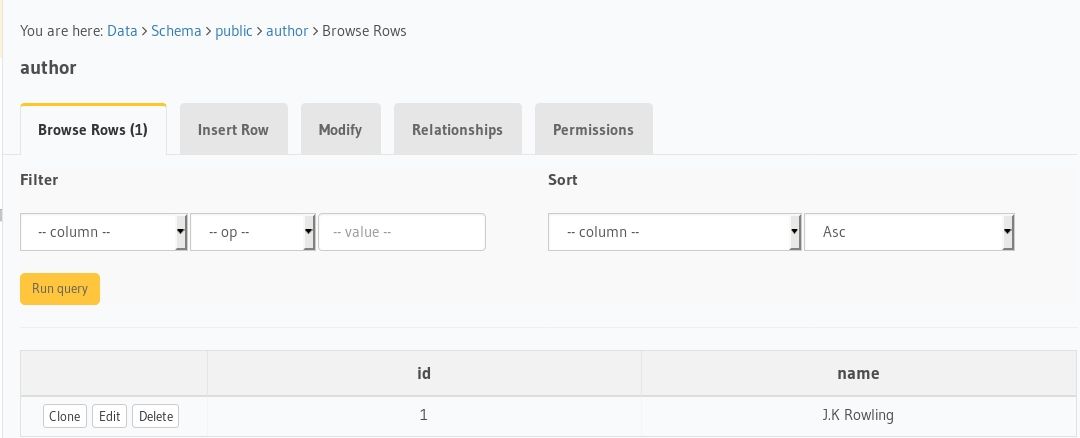
Insert sample data into
authortable:Verify if the row is inserted successfully
-
For accessing data from Hasura without
Admin Secret, we need to create unauthorized role and set permission on that role. Below are the steps for creating the role and setting up the permission:-
Add a new variable
HASURA_GRAPHQL_UNAUTHORIZED_ROLEand assign the value likeanonymous. For more information read this.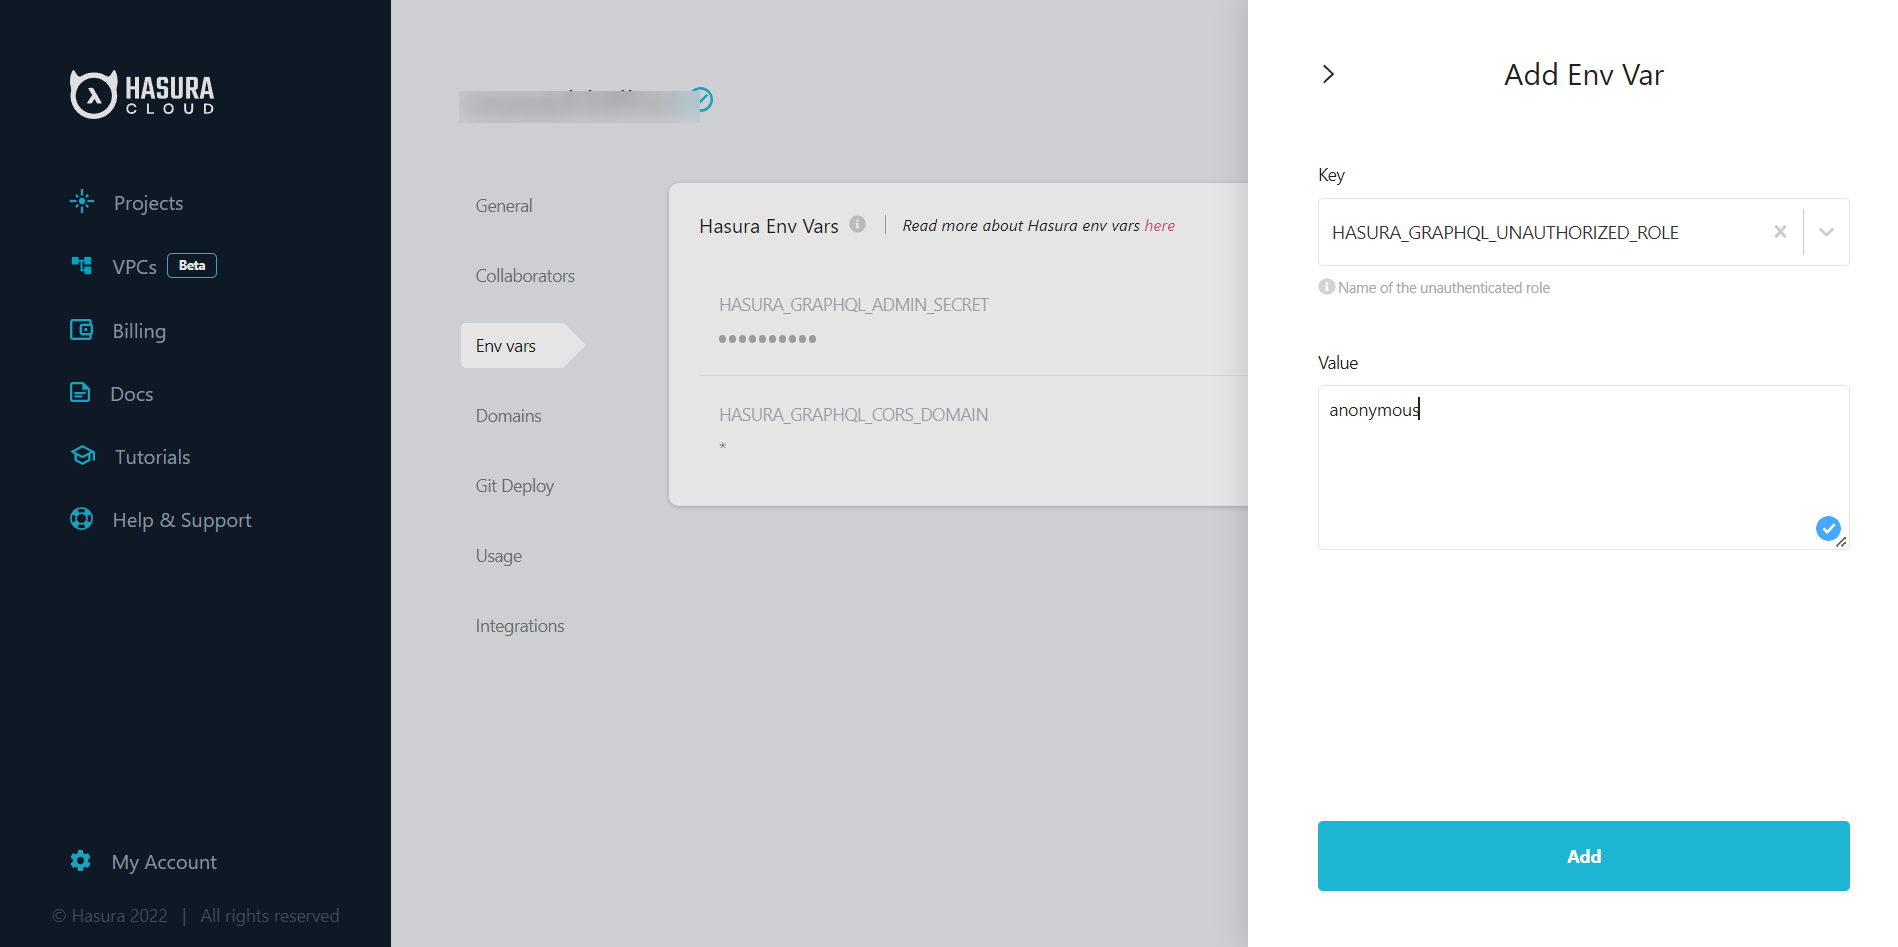
-
Second step, assign the permission to the role that you created for unauthorized users (i.e.
anonymous).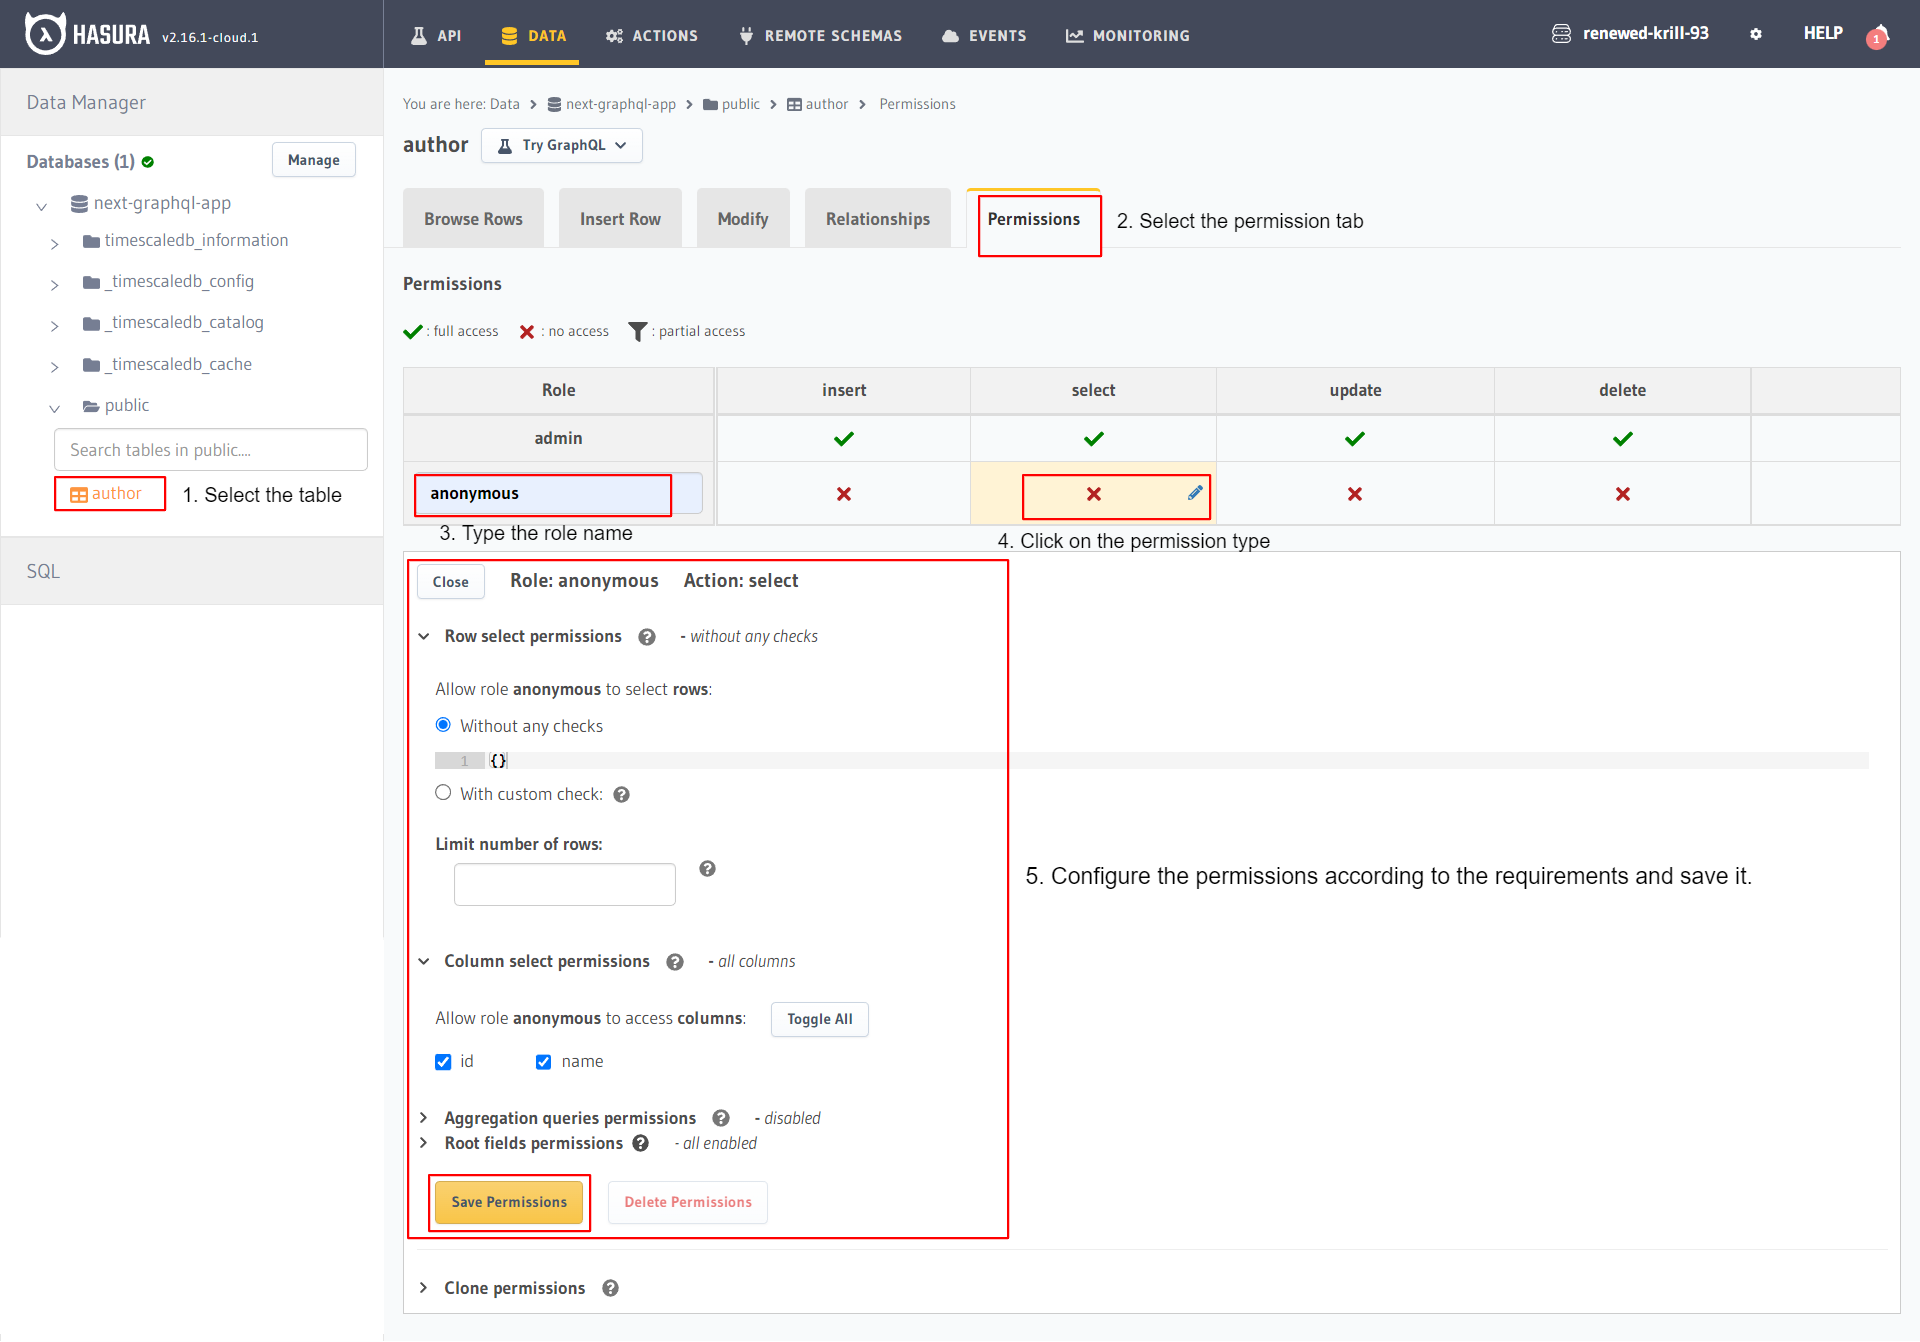
-
-
Clone this repo:
git clone https://github.com/hasura/graphql-engine cd graphql-engine/community/sample-apps/nextjs-postgres-graphql -
Install npm modules:
npm install -
Rename the
.env.exampleto.envand set the following variablesNEXT_PUBLIC_HASURA_APP_URL:- to your GraphQL API URL
-
Create config.js as follows :
-
In the first step, we initialize ApolloClient by passing its constructor a configuration object with the
uriandcache. -
In the second step, we create the HOC component using the
withApollofunction that takes 2 inputs:- a callback that returns the ApolloClient object.
- an object with a prop:
render- used to wrap your pages with<ApolloProvider>
import withApollo from 'next-with-apollo'; import { ApolloClient, ApolloProvider, InMemoryCache} from '@apollo/client'; // creating the Apollo Client const client = new ApolloClient({ uri: process.env.NEXT_PUBLIC_HASURA_APP_URL, // <- Configure GraphQL Server URL (must be absolute) cache: new InMemoryCache(), }); export default withApollo( () => { return client }, { // providing the Apollo Client access to the pages render: ({ Page, props }) => { return ( <ApolloProvider client={props.apollo}> <Page {...props} /> </ApolloProvider> ); } } ); -
-
GraphQL query
-
GraphQL query
const QUERY = gql` query { author { id name } } ` -
Execute the
QUERYquery using theuseQueryhook and fetch the Author data from the Hasura GraphQL server.const Index = () => { const { data, loading, error } = useQuery(QUERY); if (loading) { return <h2>Loading...</h2>; } if (error) { return <h2>Error..</h2>; } return ( <div> <h1>My Authors </h1> <AuthorList authors={data ? data.author : []} /> </div> ); }; export default withApollo(Index);
-
-
Run the app:
npm run dev -- -p 8000 -
Test the app Visit http://localhost:8000 to view the app
Contributing
Checkout the contributing guide for more details.


