5.5 KiB
| id | title |
|---|---|
| ci-intro | CI GitHub Actions |
When installing Playwright you are given the option to add a GitHub Actions. This creates a playwright.yml file inside a .github/workflows folder containing everything you need so that your tests run on each push and pull request into the main/master branch.
What you will learn:
GitHub Actions
Tests will run on push or pull request on branches main/master. The workflow will install all dependencies, install Playwright and then run the tests. It will also create the HTML report.
name: Playwright Tests
on:
  push:
    branches: [main, master]
  pull_request:
    branches: [main, master]
jobs:
  test:
    timeout-minutes: 60
    runs-on: ubuntu-latest
    steps:
      - uses: actions/checkout@v3
      - uses: actions/setup-node@v3
        with:
          node-version: 18
      - name: Install dependencies
        run: npm ci
      - name: Install Playwright Browsers
        run: npx playwright install --with-deps
      - name: Run Playwright tests
        run: npx playwright test
      - uses: actions/upload-artifact@v3
        if: always()
        with:
          name: playwright-report
          path: playwright-report/
          retention-days: 30
Create a Repo and Push to GitHub
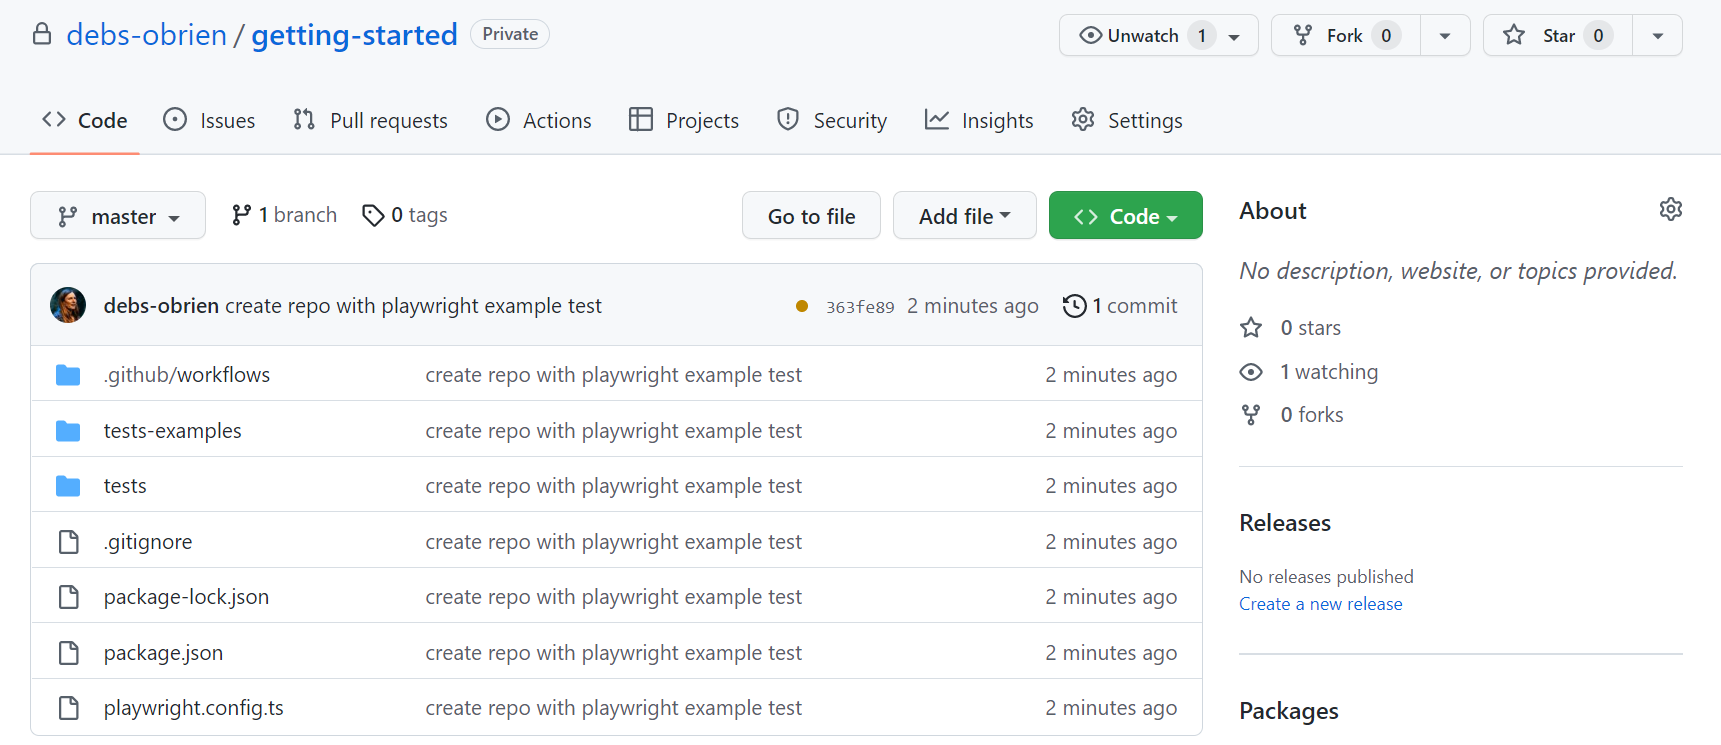
Create a repo on GitHub and create a new repository or push an existing repository. Follow the instructions on GitHub and don't forget to initialize a git repository using the git init command so you can add, commit and push your code.

Opening the Workflows
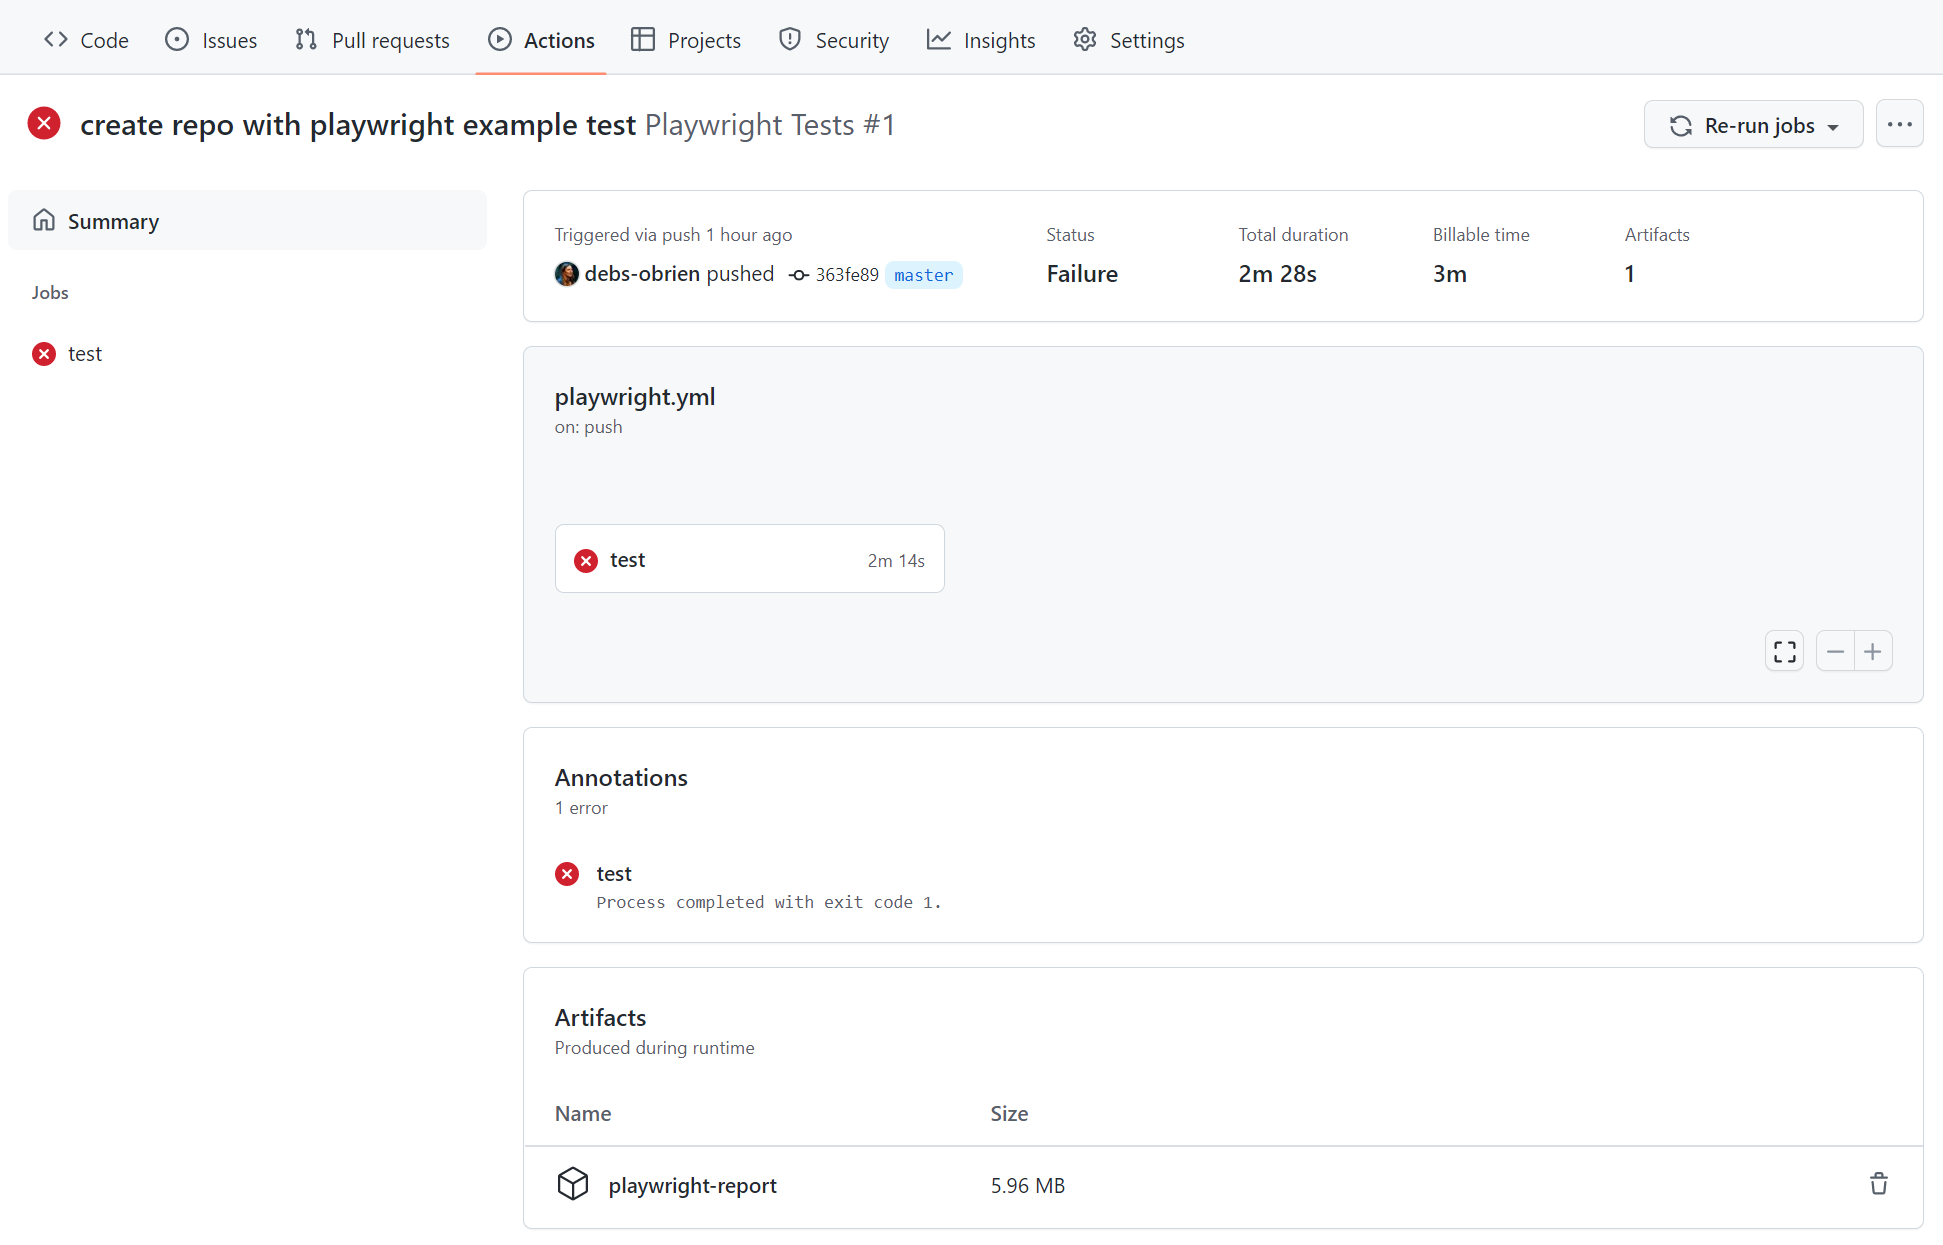
Click on the Actions tab to see the workflows. Here you will see if your tests have passed or failed.

On Pull Requests you can also click on the Details link in the PR status check.

Viewing Test Logs
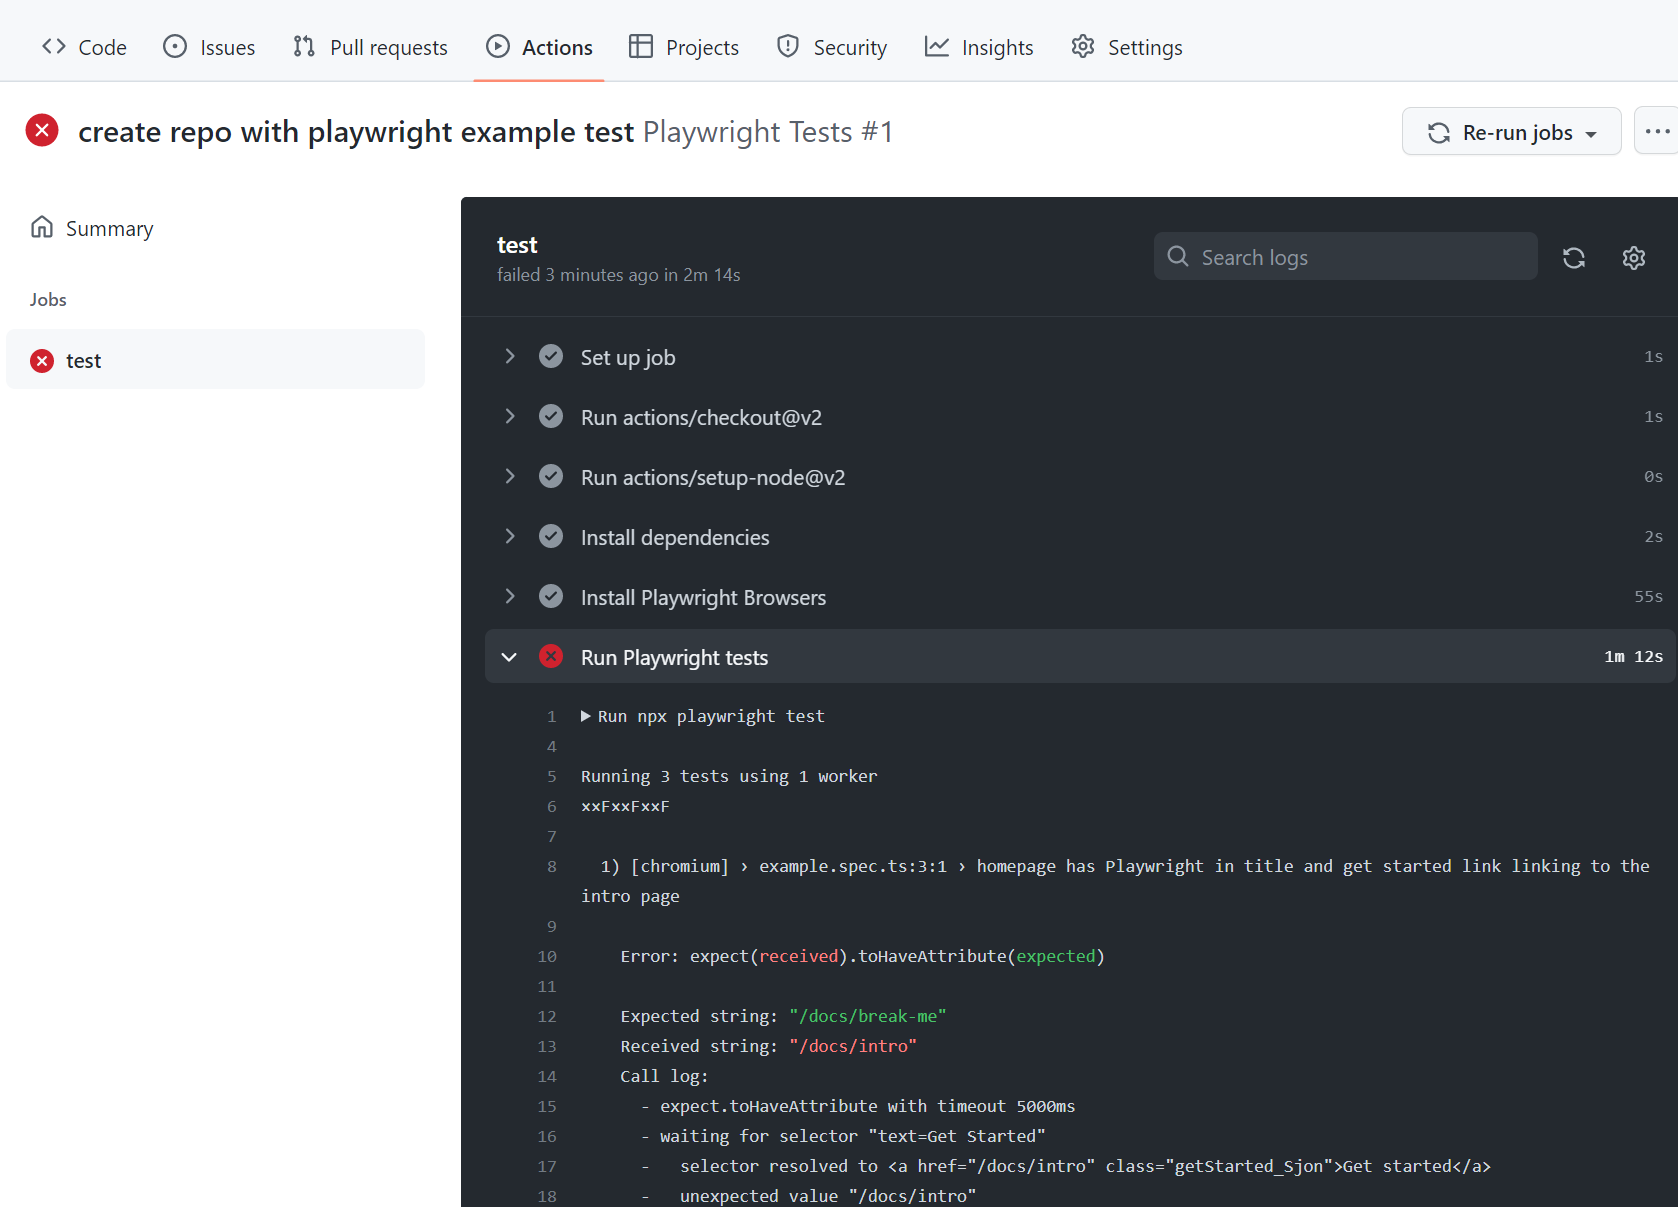
Clicking on the workflow run will show you the all the actions that GitHub performed and clicking on Run Playwright tests will show the error messages, what was expected and what was received as well as the call log.

HTML Report
The HTML Report shows you a full report of your tests. You can filter the report by browsers, passed tests, failed tests, skipped tests and flaky tests.
Downloading the HTML Report
In the Artifacts section click on the playwright-report to download your report in the format of a zip file.

Viewing the HTML Report
Locally opening the report will not work as expected as you need a web server in order for everything to work correctly. First, extract the zip, preferably in a folder that already has Playwright installed. Using the command line change into the directory where the report is and use npx playwright show-report followed by the name of the extracted folder. This will serve up the report and enable you to view it in your browser.
npx playwright show-report name-of-my-extracted-playwright-report

To learn more about reports check out our detailed guide on HTML Reporter
Viewing the Trace
Once you have served the report using npx playwright show-report, click on the trace icon next to the test's file name as seen in the image above. You can then view the trace of your tests and inspect each action to try to find out why the tests are failing.

To learn more about traces check out our detailed guide on Trace Viewer.
To learn more about running tests on CI check out our detailed guide on Continuous Integration.